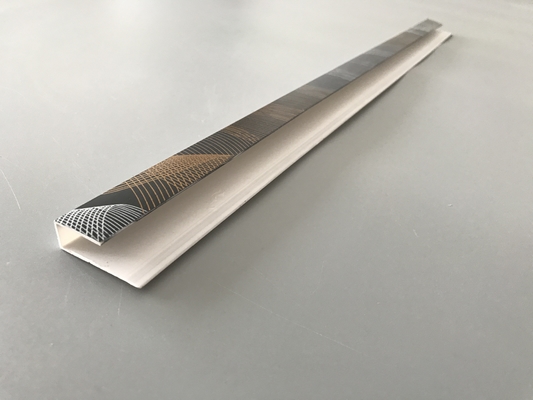
Hot Stamping U Joint PVC Extrusion Profiles For 5mm to 10mm PVC Panel
PVC Extrusion Profiles Detailed Description
| Profile Type |
PVC U joint, accessories for installing pvc wall and ceiling panel
|
| Color Finishing |
Hot stamping surface, color can be same as pvc panel
|
| Suitable Size |
5mm to 10mm thickness
|
| Length |
Usually be 40pcs/bag
|
| Payment |
T/T, L/C
|
| MOQ |
Match the quantity of pvc panel
|
| Delivery Time |
Within 15-20 days after receiving deposit
|
PVC Extrusion Profiles Features
1. Fire proof, rot proof , damp proof and rust proof
2. Water proof and heat proof
3. Easy maintenance
4. Impact Resistant
5. Light in weight and easy to install can save a lot of time and man power cost.
6. Easy to cut, drilled, nailed and sawed. PVC Wall Ceiling Panel
PVC Panel Installation
1. PVC Panels may be nailed, stapled or screwed through the panel edge groove base flap into plumb
and level wooden battens, or bonded direct to flat, plumb, sound and smooth walls or ceilings. If the
installation sub surface is uneven install an appropriate timber batten frame system to the wall or
ceiling to ensure a level batten frame to apply the panels to.
2. Installation of PVC panels should commence by attaching a scotia trim or end U Joint as required
to the wall, and or, ceiling edge joint.
3. Mechanically fix or adhere the end cap/starting profile to the wall. For wet area applications apply
a full length unbroken bead of silicone sealant into the channel of the starting profile.
4. If gluing panels to the wall, ceiling or framework, apply multiple full length beads of panel adhesive
to the back of the panel and angle it into the starting profile. Alternatively if a wooden frame sub
system is installed and nailing installation is to be used, locate the panel in position and staple or pin
through the groove base flap into the wooden framing. For wet area applications apply a small
silicone bead along the upper tongue face of the next panel. Locate the next panel tongue into the
groove of the previously installed panel and fix in the same manner as the first panel. Remove any
excess silicone once the profiles are located.
5. Continue across the sub surface or frame, using the same techniques per panel or H type trim
mid-joints can be used if required. In some cases it may be necessary to cut off the tongues or
grooves before fitting into any profiles used.
6. Use an internal or external corner trim at wall corners or returns.
7. Finish the installation of the panels by measuring and cutting the last panel to size. Finish and seal,
(for wet area use) the final edge using silicone sealant, and either an end U cap or scotia trim to the
panel edge as required, prior to fixing to the final panel and end trim as one unit to the sub surface.
8. Ensure all panel ends and edges around sinks, baths, shower trays, shower units and any pipes or cut
outs are fully sealed using silicone sealant. The PVC panel warranty will be void and no product fault
claims will be accepted, where a problem occurs due to incorrect or inappropriate sealing of joints or
seal failure as a result an inappropriate sealant being used.
9. When fixing any accessories or heavy items to the panel surface ensure that the screws used to
fix the item locate securely into the wall or battens as PVC panels are a thin cellular product and
therefore the PVC material itself has limited holding capacity. Do not over tighten screws / accessory
base plates or compression damage to the panel surface may occur.


 Your message must be between 20-3,000 characters!
 Please check your E-mail!
  Your message must be between 20-3,000 characters!
 Please check your E-mail!


