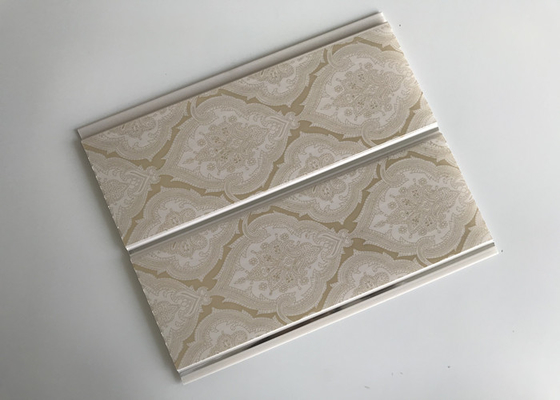
Product Details:
Payment & Shipping Terms:
|
Name: | Waterproof Wall Panels | Component: | PVC Resin And Calcium Carbonate |
---|---|---|---|
Surface Treatment: | Hot Stamping | HS Code: | 39259000 |
Weight: | 2.3 Kg/m2 | Design: | Wallpaper Design |
High Light: | moisture resistant wall panels,waterproof wall board |
200mm 8 Inch Waterproof Wall Panels Hot Stamping Wallpaper Design
Waterproof Wall Panels Features
Waterproof Wall Panels Surface treatment
1) Printing: This pvc ceiling adopts printing as surface treatment. The whole surface of the plastic ceilings is brightened by roll forming apparatus glue.
2) Hot stamping: The color design will be transferred to the panel, it can make any design if you want.
3) Laminated: With durable on the surface, so it is the most durable series
Waterproof Wall Panels Description
Product name | 200mm 8 Inch Waterproof Wall Panels Hot Stamping Wallpaper Design | |
Material | PVC resin and Calcium carbonate | |
Thickness | 7.0 mm | |
Packing details | 1. Plastic Film (PE/Shrink Film), 10 pieces for each package 2. 10 PCS per Carton 3. Customized |
|
Application |
The plastic laminate panels can be used on bathroom, kitchen or room of the house to give you that clean fresh look. ideal to help where moisture is a problem or rooms with poor or little ventilation is present. it is matched well with any decoration material. |
Installation Instructions
1) Make sure your brandering is 500mm maxmum apart.
2) Line brandering up, level/horizontal
3) PVC ceiling panels can be fitted onto 38mm*38mm wooden brandering with screw or staple gun. Steel brandering can also be used. Drill a 3.5mm hole into the brandering, then screw a 4.5mm*15mm screw into it.
4) Screw your pvc ceiling panel onto the brandering. The panels must lay in the same direction as the main trusses.
5) Make sure the screw head fasten properly and flush with the groove of ceiling panel.
6) Clip the second panel with the tongue onto the groove of first panel.
7) Knock panel gently on the side to secure close fitment. Do not carry on until the panel is fitted correctly.
8) In order to fit the last panel, cut the panel in the length with a carpet knife.
9) Close the corners with cornice
10) Dust ceiling with a cloth after fitment is done.
Contact Person: Miss. Abby
Tel: 86-18357305069
Fax: 86-573-8780-5310